Tutorial : Rasbperry Pi Desktop on your Laptop Screen
Me and my friend Suvigya working on how to work with Raspberry Pi without HDMI / AV display. As we know Raspberry Pi is knows as “Pocket Size PC”, but for debugging & project purpose its too handy to carry additional display with your Laptop. So we were start working on how to get Raspberry Pi Desktop on Laptop as virtual display & finally we got success in that. Here its tutorial how you can do the same.
Introduction ?
Raspberry Pi, a mini computer has many sockets to connect input and output peripherals. It does not have its own screen but have an HDMI output peripheral to connect to a screen. Taking a screen everywhere along with Raspberry Pi is not feasible and is useless. So we thought of using our laptop’s screen to access Pi’s desktop. This eliminates the use of any external screen connected to HDMI port. Consider that you have a Raspberry Pi but no HDMI screen to see the desktop and can also not use WiFi on Raspberry Pi.
This problem can be fixed by using an Ethernet cable to connect Raspberry Pi to Laptop. Raspberry Pi desktop can be accessed through user desktop using 100Mbps Ethernet connection between the duos. There are many softwares available that could establish connection between Raspberry Pi and your laptop.
Installing VNC server on Pi allows you to see your Raspberry Pi’s desktop remotely in a graphical way, using the mouse as if you were sitting in front of your Pi. It also means you can put your Pi somewhere else on the network, but still control it. Also, internet can be shared from laptop’s WiFi over Ethernet. This helps in accessing internet on Raspberry Pi.

Components ?
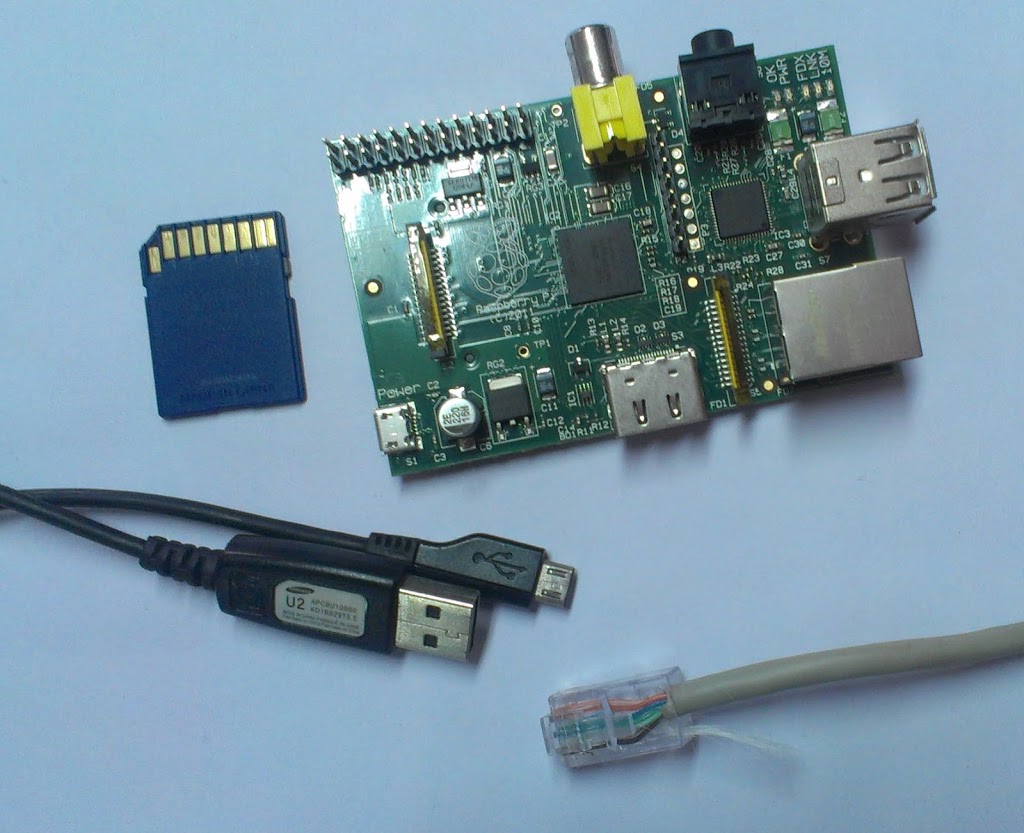
1x Raspberry Pi
1x Ethernet Cable
1x Laptop
1x SD Card
1x Micro USB Cable
(Optional) Components require for One time setup :
1x HDMI/ AV Display
1x Keyboard Mouse
Step 1 : Setting up your Raspberry Pi
After getting Raspberry Pi you need SD Card which has desired OS. You will find lots of blogs and links about making SD card for Raspberry Pi. You can follow any of them to make your own SD Card, but if you want, you can check out this link. This has vary good start up guide for Raspberry Pi.
As you are ready with your SD Card insert it into Raspberry Pi. Attach Micro USB Power Cable with it. Also attache your Raspberry Pi with your Laptop via Ethernet Cable. Connect Keyboard & Mouse with it. Also connect HDMI Display. Now power on your Pi.
Step 2 : Sharing Internet over Ethernet
This step explains you how you can share your laptop Internet with Raspberry Pi via Ethernet cable.
Windows :
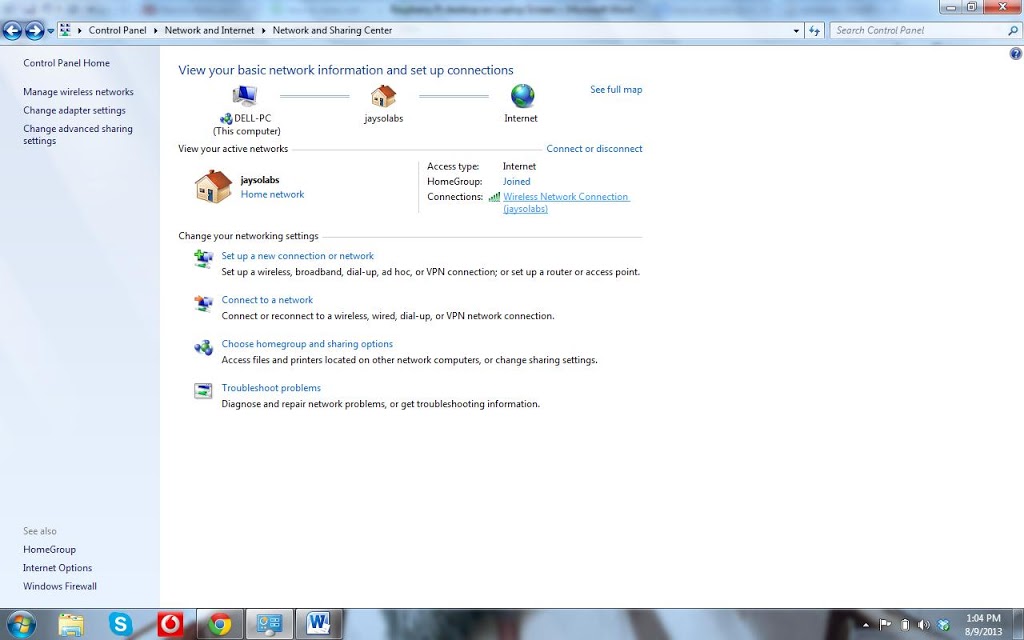
For sharing internet for multiple users over Ethernet, go to Network and Sharing Center. Click on the WiFi network
Click on Properties , then go to Sharing and click on Allow other network users to connect. Make sure that networking connection is changed to Local Area Connection.

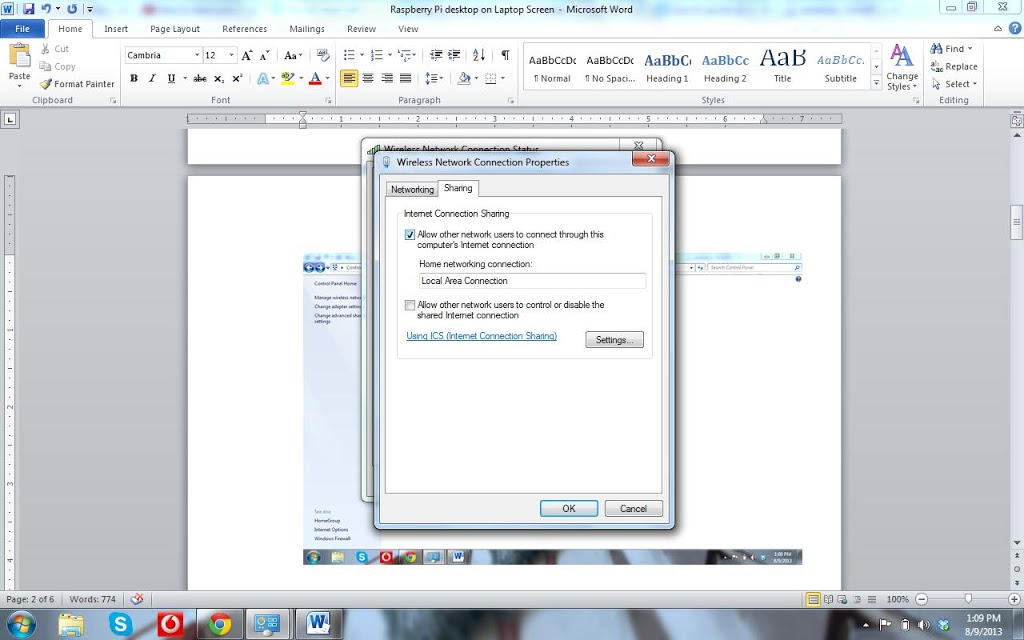
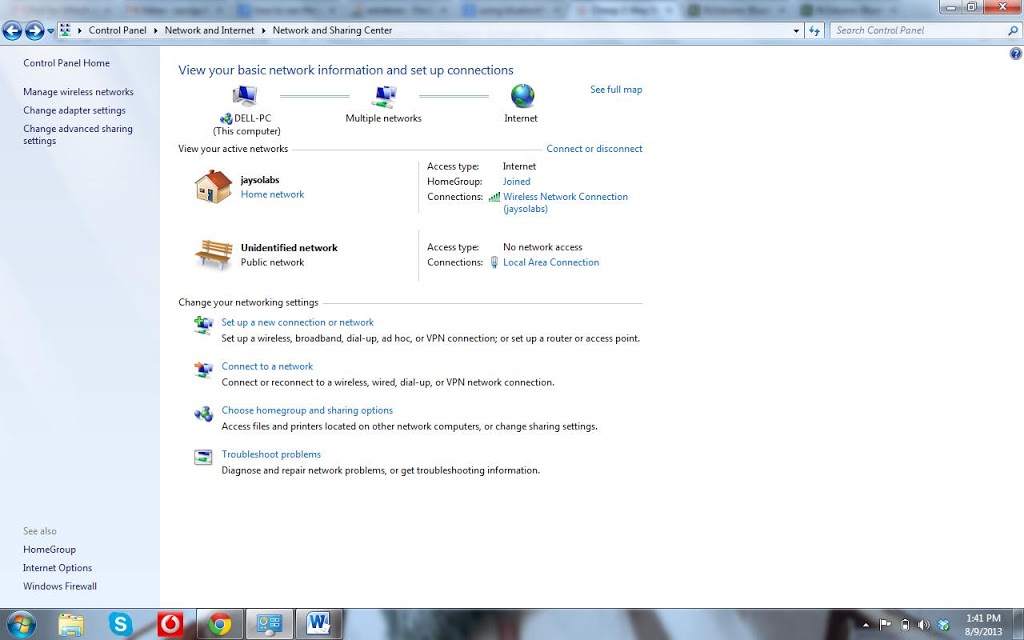
Note : Doing this will provide a dynamic IP to Ethernet port of your laptop and all the Ethernet Devices connected to your laptop.
For Checking the IP assigned to your Laptop
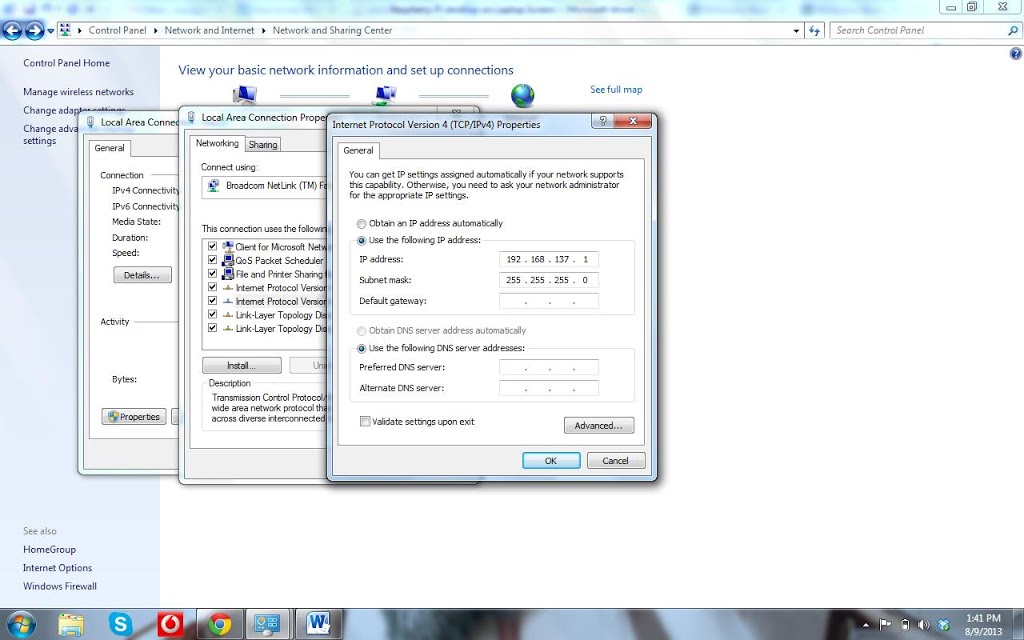
The IP assigned to your laptop is 192.168.137.1
For Checking the IP assigned to the connected Ethernet Device.
Consider that IP assigned to your Laptop is 192.168.137.1 and subnet mask is 255.255.255.0
- open command prompt.
- Ping on broadcast address of your IP i.e. ping 192.168.137.255
- Stop the ping after 5 seconds.
- Watch device replies : arp –a
Step 3 : Installing VNC server on Raspberry Pi
HDMI Display : Now you should install VNC server in Raspberry Pi. For that if you have HDMI display and Raspbian OS running on it, open LX-Terminal and type following commands to install VNC.
sudo apt-get update
sudo apt-get install tightvncserver
Don’t have Display : If you do not arrange display even for one time setup than also no need to worry you can install Putty as per your windows configuration and via SSH you can connect with your Raspberry PI. As you will get access of your Pi terminal run following command to install VNC.
sudo apt-get update
sudo apt-get install tightvncserver
Start VNC Server on Pi :
For starting VNC, enter the following command in SSH terminal,
vncserver :1
You will be prompted to enter and confirm a password. This will be asked only once, during one time setup. Enter an 8 digit password. Note that this is the password that you will need to use to connect to the Raspberry Pi remotely.
You will also be asked if you want to create a separate “read-only” password – say no (n).
Yuppiii…The VNC server is now running on your Pi and so we can attempt to connect to it, but first we must switch to the computer from which we want to control the Pi and setup a VNC client to connect to the Pi.
Step 4 : Client Side (Laptop)
Download VNC client from http://www.realvnc.com/download/vnc/ and install it. When you first run VNC Viewer, you will see following:
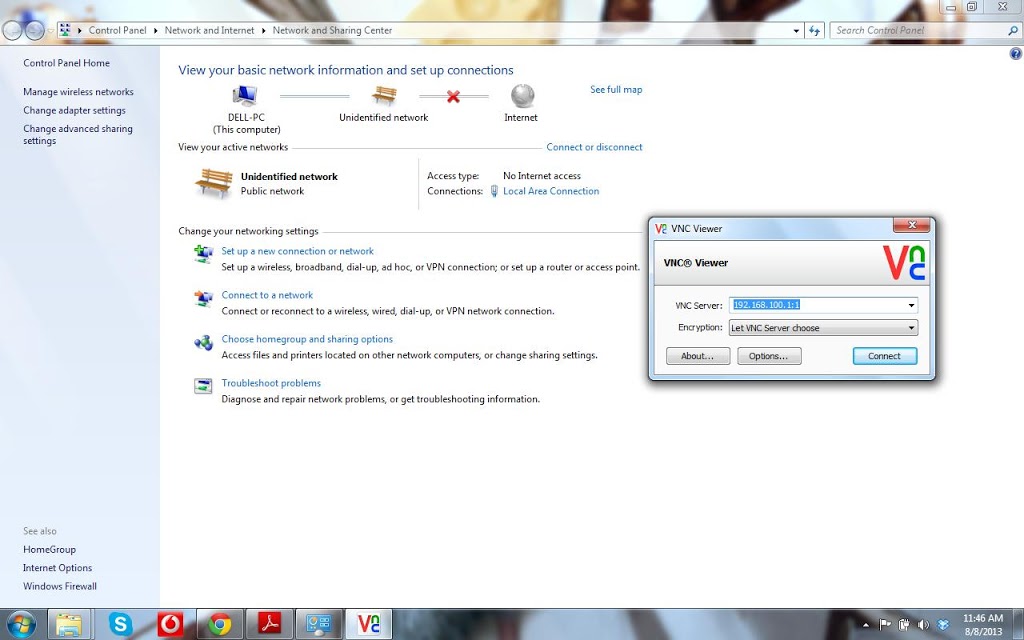
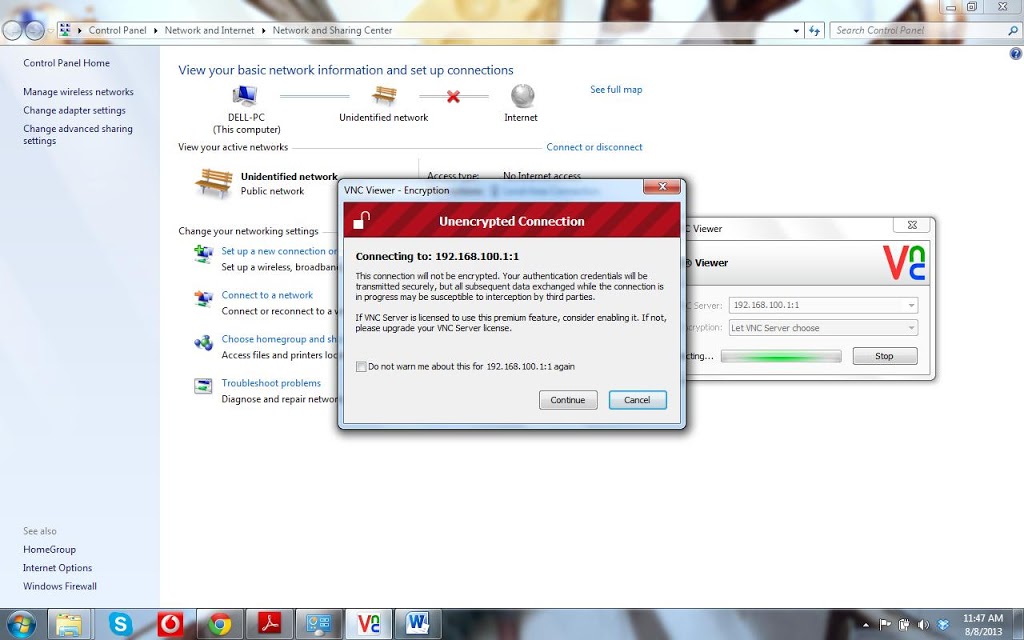
Enter IP address of your Raspberry Pi given dynamically by your laptop and append with :1 (denoting port number) and press connect. You will get a warning message, press ‘Continue’.
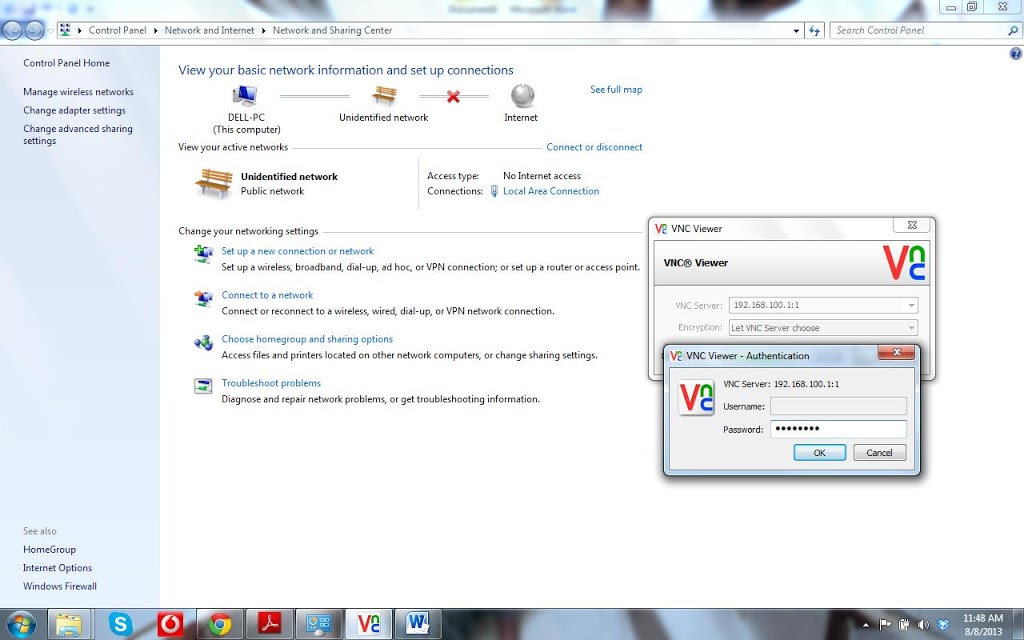
Enter the 8 digit password which was entered in VNC server installation on Raspberry Pi.
Finally, the VNC window itself should appear. You will be able to use the mouse and do everything as if you were using the Pi’s keyboard mouse and monitor, except through your other computer. As with SSH, since this is working over your network, your Pi could be situated anywhere, as long as it is connected to your network.

Step 5 : Running VNC server at startup in Raspberry Pi
Connecting to your Raspberry Pi remotely with VNC is fine as long as your Pi does not reboot. If it does, then you either have to connect with SSH and restart the VNC Server or arrange for the VNC Server to run automatically after the Raspberry Pi reboots. To ensure that VNC starts automatically, run following commands on terminal.
Open “.config” folder from Pi user folder. (It is hidden folder)
$ cd /home/pi
$ cd .config
Create folder called “autostart” in it. Also create file called “tightvnc.desktop” in that folder. To create file you can use any known text editor. Here I use gnome-text-editor for this.
$ mkdir autostart
$ cd autostart
$ gnome tightvnc.desktop
Edit the contents of file with following text and save the file.
[Desktop Entry]
Type=Application
Name=TightVNC
Exec=vncserver :1
StartupNotify=false
Now next time you will reboot your Pi vncserver server will start automatically.
Congratulation!!!
Next time onward whenever you want to do something with your Pi, just connect it with Ethernet Cable to you Laptop and power on it. Open VNCViewver, mention IP address of your Pi and you are ready with you Pi display on your Laptop Screen.